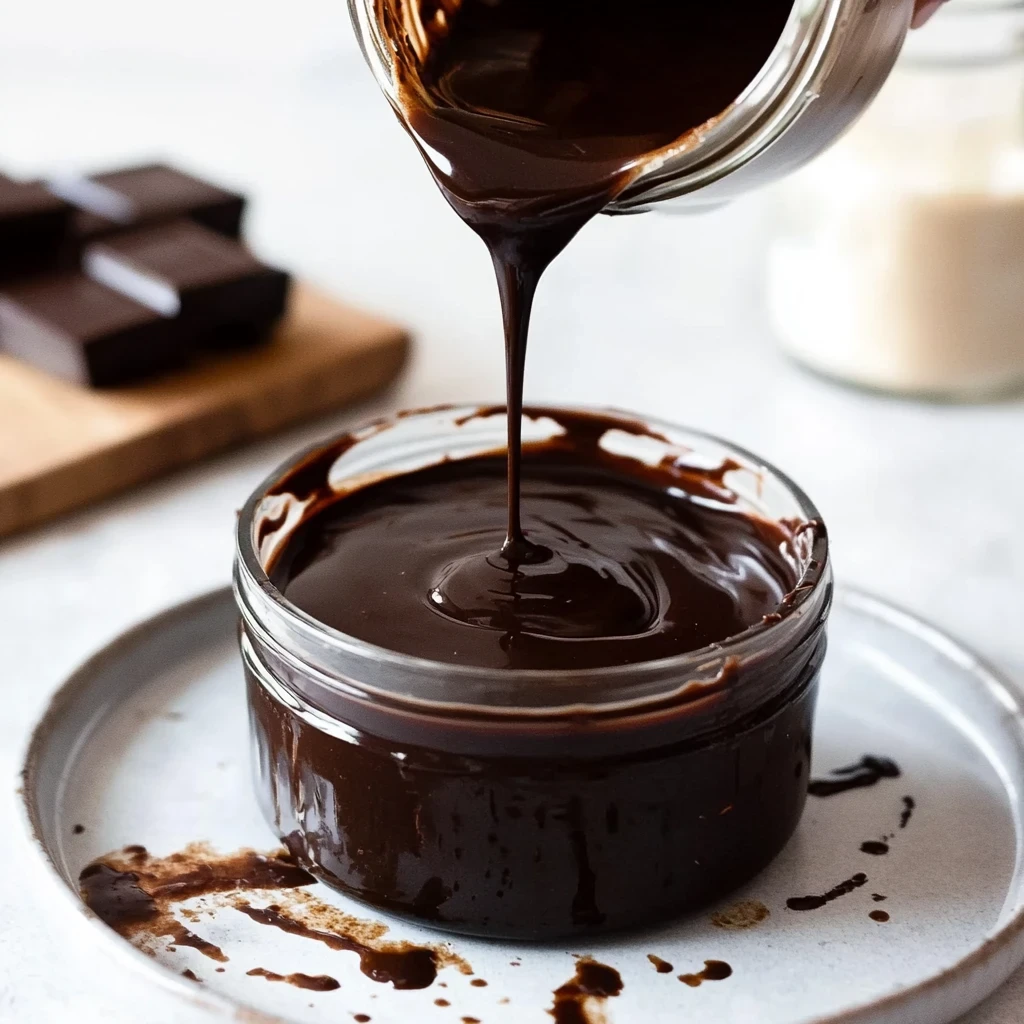
Imagine drizzling a luscious, velvety chocolate syrup over your favorite dessert, transforming an ordinary scoop of vanilla ice cream into a heavenly treat. This chocolate syrup recipe is not just a simple blend of ingredients; it’s a nostalgic journey back to childhood, where every Sunday was dedicated to sweet indulgence and messy hands.

Jump to:
- <strong>Essential Ingredients</strong>
- <strong>Let’s Make it together</strong>
- <strong>Chocolate Syrup Recipe</strong>: A Sweet Delight
- <strong>Perfecting the Cooking Process</strong>
- <strong>Ingredients You’ll Need</strong>
- <strong>Step-by-Step Instructions</strong>
- <strong>Storing Your Chocolate Syrup</strong>
- <strong>Ways to Enjoy Your Chocolate Syrup</strong>
- <strong>Add Your Touch</strong>
- <strong>Storing & Reheating</strong>
- <strong>FAQ</strong>
- What are the main ingredients in the chocolate syrup recipe?
- How long does it take to make the chocolate syrup?
- Can I store homemade chocolate syrup?
Picture yourself gathering around the table with loved ones, laughter filling the air as you pour this rich concoction over pancakes or brownies. The aroma wafts through the kitchen, promising an explosion of flavor that will make taste buds dance with delight. Whether it’s a cozy family brunch or a last-minute dessert craving, this chocolate syrup will elevate any occasion, leaving everyone in sweet anticipation of what’s to come.
Why You'll Love This Recipe
- This chocolate syrup recipe is so easy, even your pet goldfish could follow it—if only they had hands!
- The rich, deep chocolate flavor will make you feel like a kid in a candy store, craving every drop
- Its glossy texture and luscious color will have your desserts looking like they just stepped off a magazine cover
- Use it for drizzling over ice cream or as a secret ingredient in baking to elevate your treats to gourmet status
I still remember the joy on my kids’ faces when they tasted this chocolate syrup for the first time.
Essential Ingredients
Here’s what you’ll need to make this delicious chocolate syrup recipe:
- Granulated Sugar: Use a standard white granulated sugar for optimal sweetness and consistency in your syrup.
- Water: Fresh, clean water is essential for dissolving the sugar and cocoa smoothly.
- Unsweetened Cocoa Powder: Choose high-quality cocoa powder for a rich chocolate flavor in your syrup.
- Vanilla Extract: Opt for pure vanilla extract to elevate the overall taste of your chocolate syrup.
- Salt: A pinch of salt enhances the sweetness and balances the flavors beautifully.
The full ingredients list, including measurements, is provided in the recipe card directly below.
Let’s Make it together
Gathering Your Ingredients: Start this delightful journey by measuring out your ingredients. You will need 1 cup of granulated sugar, 1 cup of unsweetened cocoa powder, and a pinch of salt. These simple ingredients will transform into a rich chocolate syrup that you can use in countless ways. Have your 1 cup of water and 1 teaspoon of vanilla extract ready for the next steps. A whisk is essential for combining everything smoothly, and a medium-sized saucepan will be your trusty vessel.
Mixing the Dry Ingredients: In your saucepan, combine the granulated sugar, cocoa powder, and that pinch of salt. As you mix these dry ingredients together, take a moment to appreciate the deep, rich aroma of cocoa filling the air. This is where the magic begins! Use a whisk to ensure there are no lumps; the smoother the mixture, the better your syrup will turn out.
Bringing it to a Boil: Gradually pour in 1 cup of water while continuously whisking to create a smooth mixture. This step is crucial as it helps dissolve any remaining clumps of cocoa powder. Place your saucepan over medium heat and keep stirring frequently until you see that beautiful mixture come to a gentle boil. The color should deepen as it heats up, revealing that luscious chocolate hue we all adore.
Simmering for Perfection: Once boiling, reduce the heat to low and let your syrup simmer for about 5 minutes. Stir occasionally during this time; you’ll notice the syrup thickening slightly and releasing an irresistible chocolate scent that fills your kitchen with warmth. This is also the perfect opportunity to taste-test—just dip a spoon in and savor that chocolaty goodness!
Finishing Touches: After 5 minutes on low heat, remove your saucepan from the stove and stir in 1 teaspoon of vanilla extract. This addition enhances the flavor profile beautifully; you’ll love how it rounds out that chocolate taste! Allow your syrup to cool down a bit before transferring it into a clean storage container. Don’t rush this step; letting it cool will help thicken it further.
Storing Your Chocolate Syrup: Once cooled, pour your homemade chocolate syrup into an airtight container for storage. It can be kept in the fridge for up to two weeks—if it lasts that long! Use it generously on ice cream, pancakes, or even in your favorite milkshake recipes. Enjoy this sweet creation!
Chef's Helpful Tips
- For a smoother syrup, ensure you whisk the sugar and cocoa powder together thoroughly before adding water
- Keep an eye on the mixture while it’s boiling to prevent any burning or sticking
- Let the syrup cool completely before storing; this helps maintain its rich flavor and consistency
Chocolate Syrup Recipe: A Sweet Delight
Making your own chocolate syrup is not only easy, but it’s also incredibly satisfying. This chocolate syrup recipe requires just a few simple ingredients and minimal cooking time, making it perfect for drizzling over desserts or mixing into drinks. With a total time of just 15 minutes, you’ll have rich and delectable syrup ready to enjoy.
Perfecting the Cooking Process
To achieve the best results with this chocolate syrup recipe, start by combining the sugar, cocoa powder, and salt in a saucepan. Gradually whisk in the water to create a smooth mixture. Bring it to a boil over medium heat before letting it simmer for five minutes for optimal flavor.
Ingredients You’ll Need
For this chocolate syrup recipe, gather the following ingredients: 1 cup granulated sugar, 1 cup water, 1 cup unsweetened cocoa powder, 1 teaspoon vanilla extract, and a pinch of salt. These ingredients come together to create a rich and velvety syrup that enhances any dessert.
Step-by-Step Instructions
Follow these straightforward steps to prepare your chocolate syrup. In a saucepan, combine the sugar, cocoa powder, and salt. Gradually add the water while whisking to combine until smooth. Place the saucepan over medium heat and bring the mixture to a boil, stirring frequently. Once boiling, reduce the heat and let it simmer for about five minutes while stirring occasionally. Afterward, remove it from heat and stir in the vanilla extract. Allow the syrup to cool before transferring it to a storage container for future use.
Storing Your Chocolate Syrup
After preparing your chocolate syrup recipe, store it in an airtight container in the refrigerator. It can last for up to two weeks if kept properly sealed. When you’re ready to use it again, simply reheat gently on low heat or microwave for a few seconds until pourable.
Ways to Enjoy Your Chocolate Syrup
This homemade chocolate syrup is versatile and can elevate many treats. Drizzle it over ice cream sundaes, mix it into milk for chocolate milk, or use it as a topping on pancakes or waffles. The possibilities are endless when you have this delicious chocolate syrup on hand!
Add Your Touch
Feel free to personalize this chocolate syrup recipe by experimenting with different flavors. Try adding a splash of almond extract for a nutty twist or a touch of espresso powder for a coffee-infused richness. You could also incorporate a pinch of cinnamon for warmth or even a few drops of peppermint extract for a festive flair.
Storing & Reheating
To store your chocolate syrup, pour it into an airtight container and refrigerate for up to two weeks. When reheating, warm the syrup gently in a saucepan over low heat for 5 minutes, stirring frequently until it reaches your desired consistency.
FAQ
What are the main ingredients in the chocolate syrup recipe?
The chocolate syrup recipe requires sugar, cocoa powder, water, vanilla extract, and salt.
How long does it take to make the chocolate syrup?
The total time for this chocolate syrup recipe is 15 minutes.
Can I store homemade chocolate syrup?
Yes, allow it to cool before transferring to a storage container for later use.