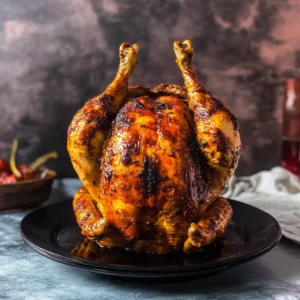
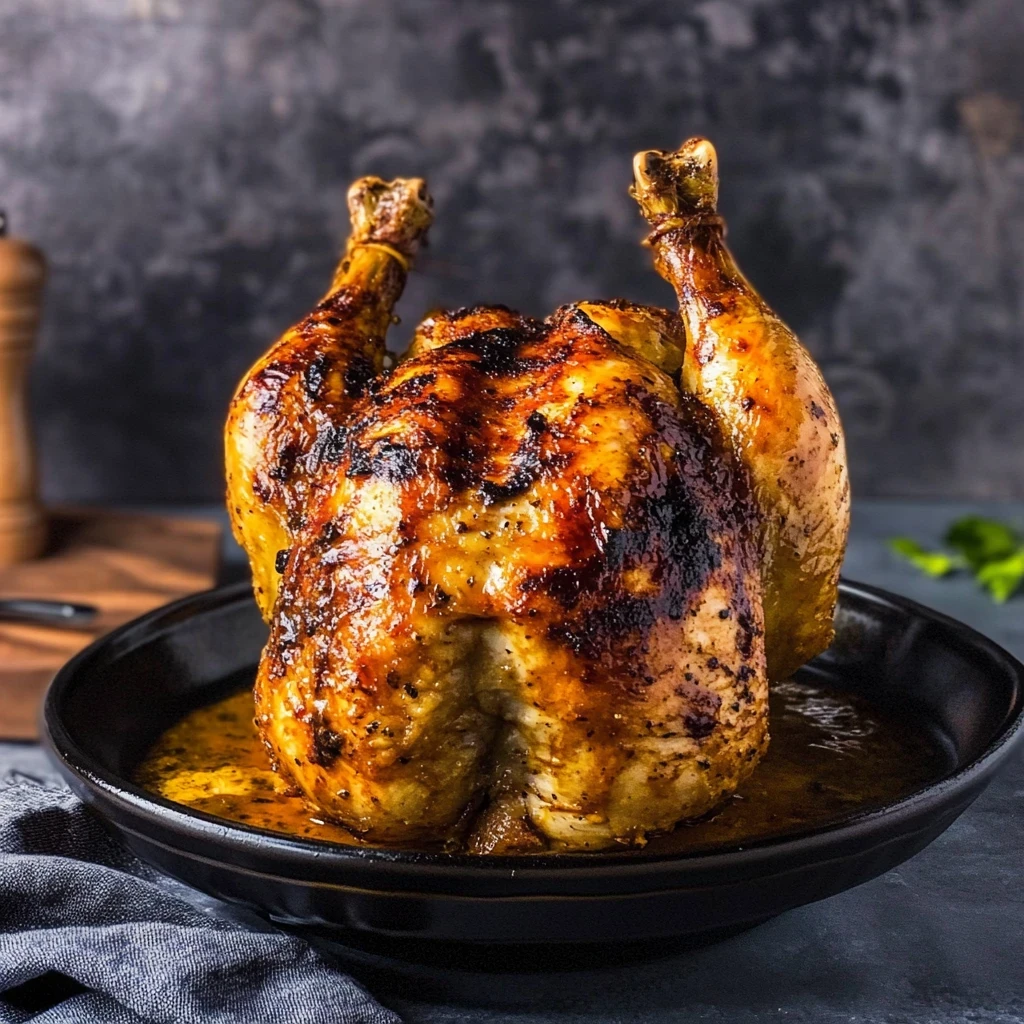
Imagine biting into succulent, juicy meat that’s bursting with flavor, perfectly seasoned and kissed by the smoky aroma of the grill. Beer can chicken is not just a dish; it’s an experience that transforms any backyard barbecue into a culinary celebration. Whether you’re hosting the ultimate summer cookout or simply enjoying a cozy evening with family, this dish promises to elevate your grilling game while adding a touch of fun and flair.

Jump to:
- <strong>Essential Ingredients</strong>
- <strong>Let’s Make it together</strong>
- <strong>Perfecting the Cooking Process</strong>
- <strong>Add Your Touch</strong>
- <strong>Storing & Reheating</strong>
- <strong>FAQ</strong>
- What is beer can chicken?
- How long does it take to cook beer can chicken?
- Can I use any type of beer for beer can chicken?
I still remember my first encounter with beer can chicken—my uncle proudly unveiled it at a family reunion, and I was instantly mesmerized by the sight of that plump bird perched atop its beer throne. The laughter, the camaraderie, and the mouthwatering scent wafting through the air brought everyone together in joyful anticipation. Now, I invite you to recreate those cherished moments with your loved ones as you dive into this easy-to-follow recipe that guarantees crispy skin and tender meat infused with delightful flavors. Grab your lager, fire up that grill, and get ready for an unforgettable feast!
Why You'll Love This Recipe
- This beer can chicken is a hilarious twist on grilling that makes preparation as easy as popping open a cold one
- Bursting with flavor, the spice rub infuses every juicy bite, ensuring your taste buds are in for a wild ride
- Its impressive stature while perched on the grill is sure to be the talk of the barbecue, making it a visual feast
- Not just for grilling, this recipe allows you to get creative with vegetables or even experiment with different spices!
One summer evening, my family gathered around the grill, amazed by how juicy and flavorful the beer can chicken turned out.
Essential Ingredients
Here’s what you’ll need to make this delicious beer can chicken:
-
Whole Chicken: Use a whole chicken weighing about 4-5 pounds for optimal cooking and flavor.
-
Lager Beer: A can of light lager works best; choose one that you enjoy drinking.
For the Spice Rub:
-
Olive Oil: Two tablespoons help the spice mix adhere to the chicken, enhancing flavor.
-
Paprika: Adds a beautiful color and mild sweetness to your chicken; opt for smoked for extra depth.
-
Garlic Powder: This brings a robust flavor; use fresh garlic for an even more intense taste if preferred.
-
Onion Powder: Complements the garlic and adds depth; choose a good quality brand for best results.
-
Salt: Essential for seasoning; kosher salt is preferred for its texture and flavor balance.
-
Black Pepper: Freshly ground black pepper enhances the spice rub with its aromatic kick.
-
Cayenne Pepper (optional): Add this spice if you enjoy heat; adjust according to your taste preference.
For the Vegetables:
-
Carrots: Cut into chunks, they add sweetness and color; choose firm, fresh carrots for best results.
-
Potatoes: Cut into chunks, these provide heartiness; any variety will work, but Yukon Gold is a great choice.
-
Onions: Quartered onions add flavor and moisture during cooking; yellow or sweet onions are ideal here.
The full ingredients list, including measurements, is provided in the recipe card directly below.
Let’s Make it together
Preparation: Begin by preheating your grill to a medium-high heat, aiming for a cozy range of 375°F to 400°F. This will create the perfect environment for that mouthwatering crispy skin we all love. While the grill warms up, take a moment to gather your spices. In a small bowl, combine two tablespoons of olive oil with one tablespoon each of paprika, garlic powder, onion powder, salt, and black pepper. For those who crave a bit of heat, add a teaspoon of cayenne pepper. The aroma will instantly transport you to a summer cookout! Once mixed, take this vibrant spice blend and generously rub it all over your chicken, making sure to get under the skin where the magic happens.
Beer Preparation: Now it’s time to open up your can of lager beer. Drink or pour out half—this step is crucial because it allows the steam from the beer to infuse into the chicken as it cooks. Place the beer can inside its holder and carefully insert it into the cavity of the seasoned chicken. This unique setup not only helps keep the chicken upright but also ensures even cooking. You’ll love how sturdy it feels as you position it on your grill.
Cooking Setup: With everything set, gently place your chicken on the grill, ensuring it’s standing tall on that beer can holder. The sight is quite impressive! As it cooks for about 1.5 hours, resist the urge to peek too often—the heat needs to stay in. Use a meat thermometer to check for doneness; you’re looking for an internal temperature of 165°F (75°C).
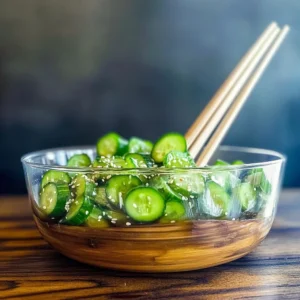
Adding Vegetables: About 15 minutes before you expect your chicken to be done, toss in your hearty vegetables—carrots, potatoes, and onions cut into chunks—around the chicken on the grill. The smell of roasting veggies mingling with that succulent chicken is truly heavenly and adds color and flavor to your meal.
Resting Time: Once cooked to perfection, carefully remove the chicken from the grill using tongs (watch out for hot steam!). Let it rest for about 10 minutes; this crucial step allows juices to redistribute throughout the meat, ensuring each bite is tender and juicy. When ready to serve, gather around with your loved ones and enjoy this delightful beer can chicken experience!
Chef's Helpful Tips
- Ensure the chicken is at room temperature before grilling for even cooking and better skin crispiness
- Avoid overcrowding the grill; give the chicken space to cook evenly
- Let the chicken rest after grilling for juicier meat and enhanced flavor
Perfecting the Cooking Process
For the best results with your beer can chicken, start by preheating the grill to medium-high heat at 375°F to 400°F. While it heats, prepare your spice mixture and rub it onto the chicken. Once coated, insert the beer can into the chicken and place it on the grill for 90 minutes of cooking. During the last 15 minutes, add your vegetables around the chicken for a complete meal.
Add Your Touch
Feel free to customize your beer can chicken by swapping the lager for a different beer, like a stout or IPA, for unique flavors. Experiment with seasonings such as thyme or rosemary instead of paprika. You can also add your favorite veggies, like bell peppers or zucchinis, for extra color and taste.
Storing & Reheating
To store leftover beer can chicken, refrigerate it in an airtight container for up to three days. When reheating, preheat your oven to 350°F (175°C) and warm the chicken for about 20-25 minutes until heated through. Ensure the internal temperature reaches 165°F (75°C) before serving.
FAQ
What is beer can chicken?
Beer can chicken is a cooking method where a whole chicken is cooked upright on a beer can.
How long does it take to cook beer can chicken?
It takes about 90 minutes to cook beer can chicken on a grill.
Can I use any type of beer for beer can chicken?
Yes, any light lager works well for making beer can chicken.